Control which fields and payment details appear on printed receipts.Documentation Index
Fetch the complete documentation index at: https://docs.ofatoura.com/llms.txt
Use this file to discover all available pages before exploring further.
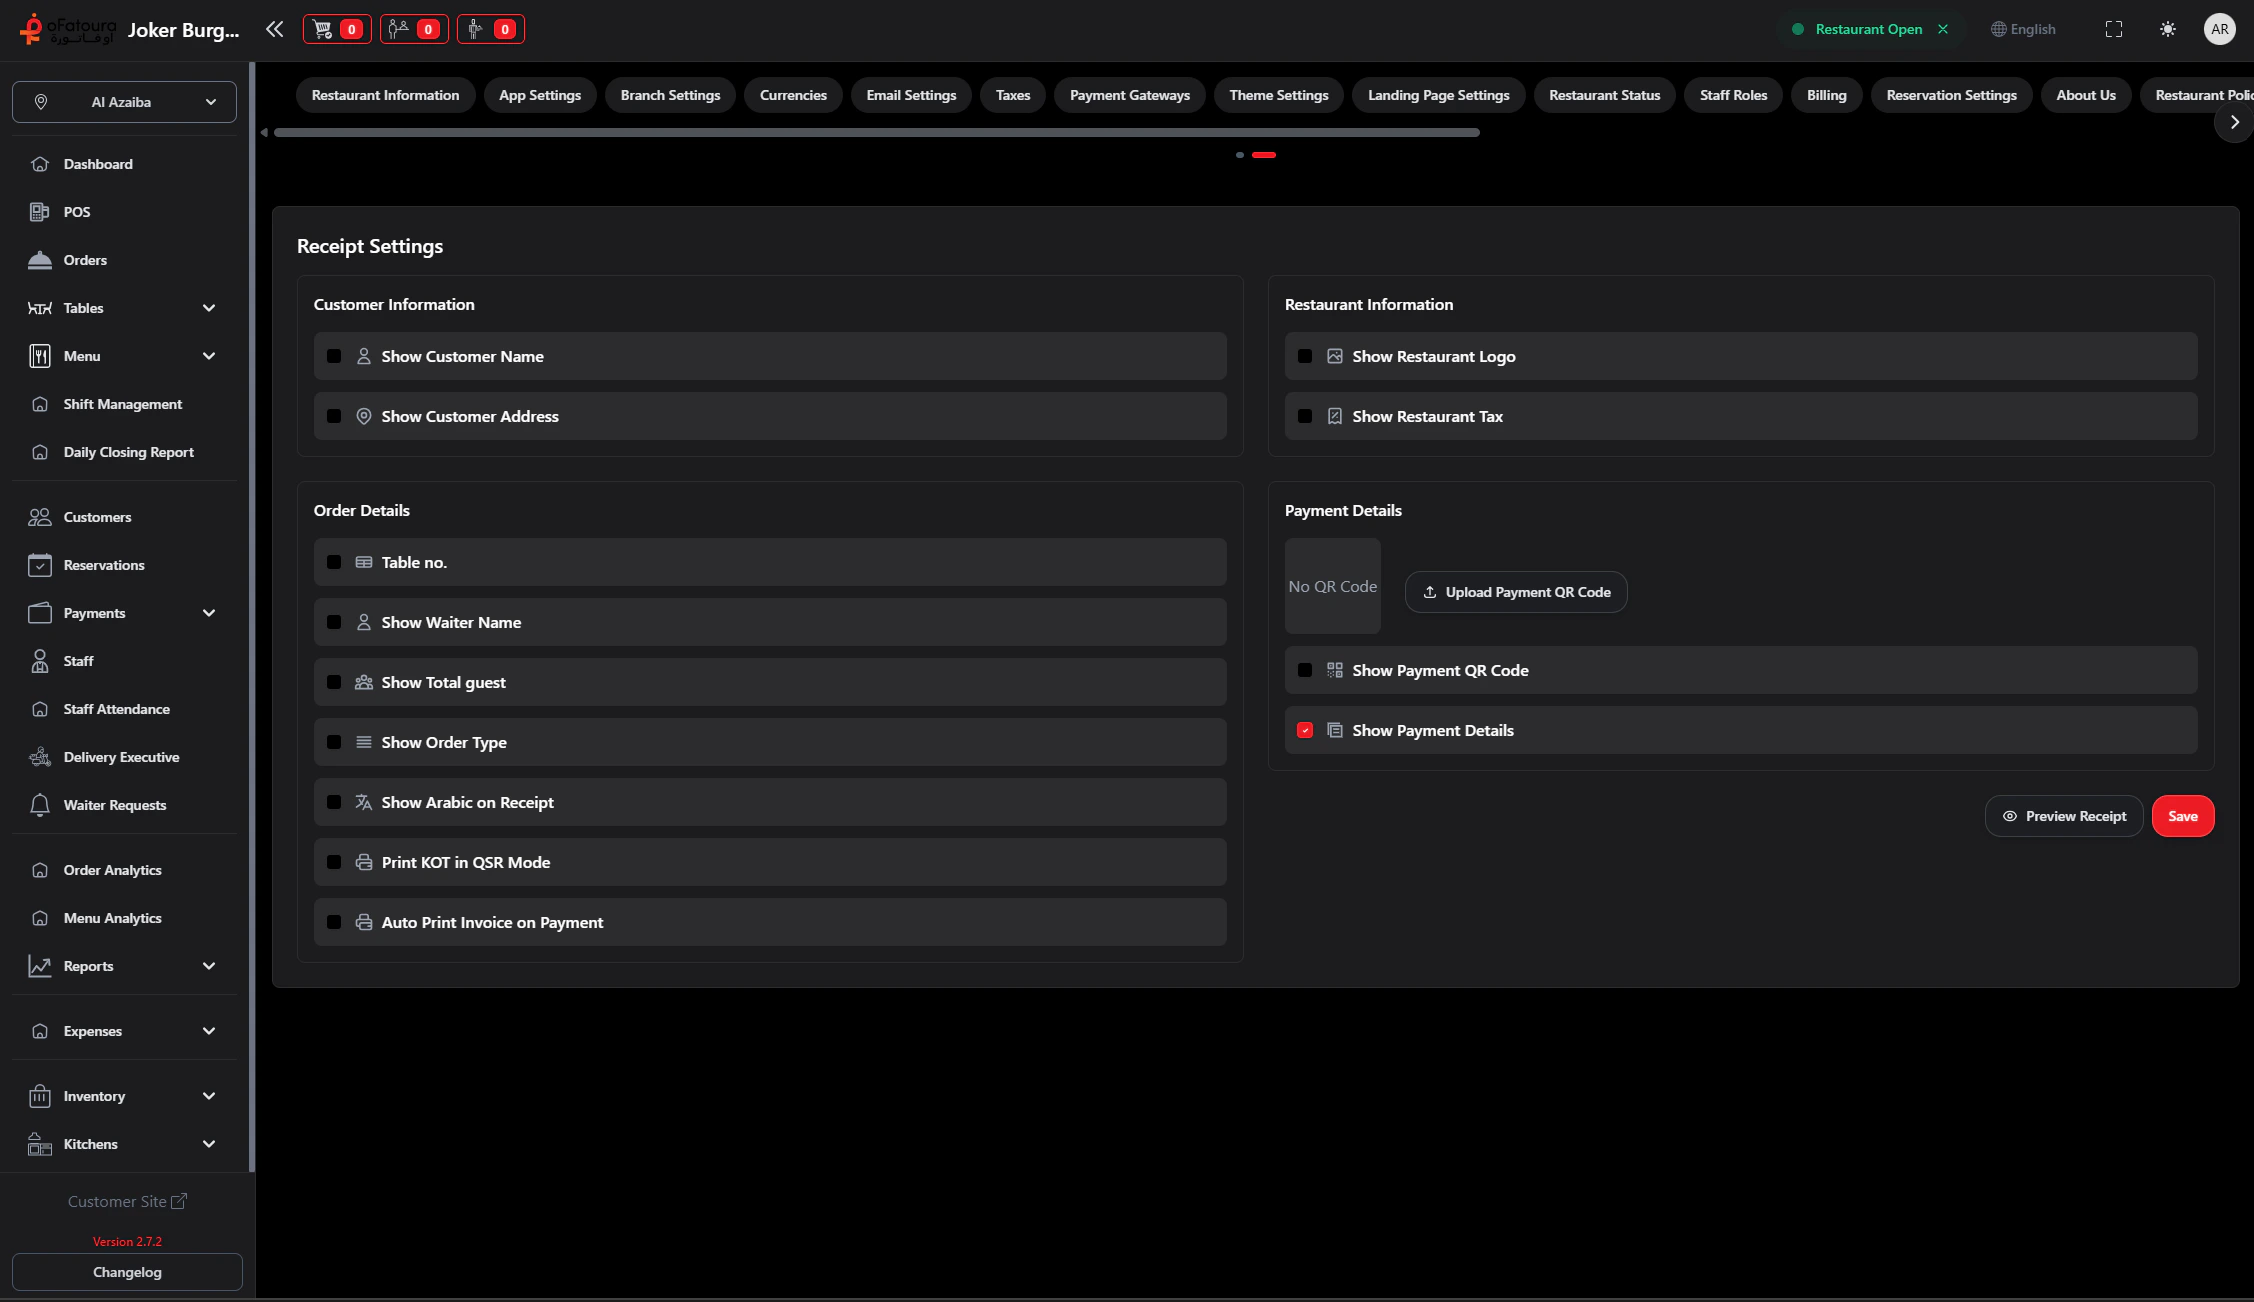
Essential Receipt Elements
- Customer Section: Show/hide customer name and address.
- Order Section: Show/hide table number, waiter, guests, and order type.
- Restaurant Section: Show/hide logo and tax details.
- Payment Section: Upload payment QR and show/hide QR and payment details.
- Extra Toggles: Arabic on receipt and auto print invoice.
Customization Panel
Access Editor
- Go to Settings > Receipt Settings.
- Here you see a preview or an editor for the receipt layout.
Customer and Order Fields
Toggle what appears for:
- Customer name/address
- Table number
- Waiter
- Total guests
- Order type
- Arabic text on receipt
Restaurant and Payment Blocks
- Toggle restaurant logo and tax visibility.
- Upload payment QR code.
- Toggle Show Payment QR Code and Show Payment Details.
If Show Payment QR Code is enabled, upload a valid QR image before saving.
Printers
Hardware setup
Taxes
Configure tax rates