Use the Orders page to monitor service flow and open order details quickly.Documentation Index
Fetch the complete documentation index at: https://docs.ofatoura.com/llms.txt
Use this file to discover all available pages before exploring further.
Order Statuses
- Draft: Started but not yet moved into kitchen flow.
- KOT / Billed: In preparation or billed state.
- Payment Due / Paid: Payment pending or completed.
- Canceled / Delivered: Finalized order outcomes.
Managing Orders
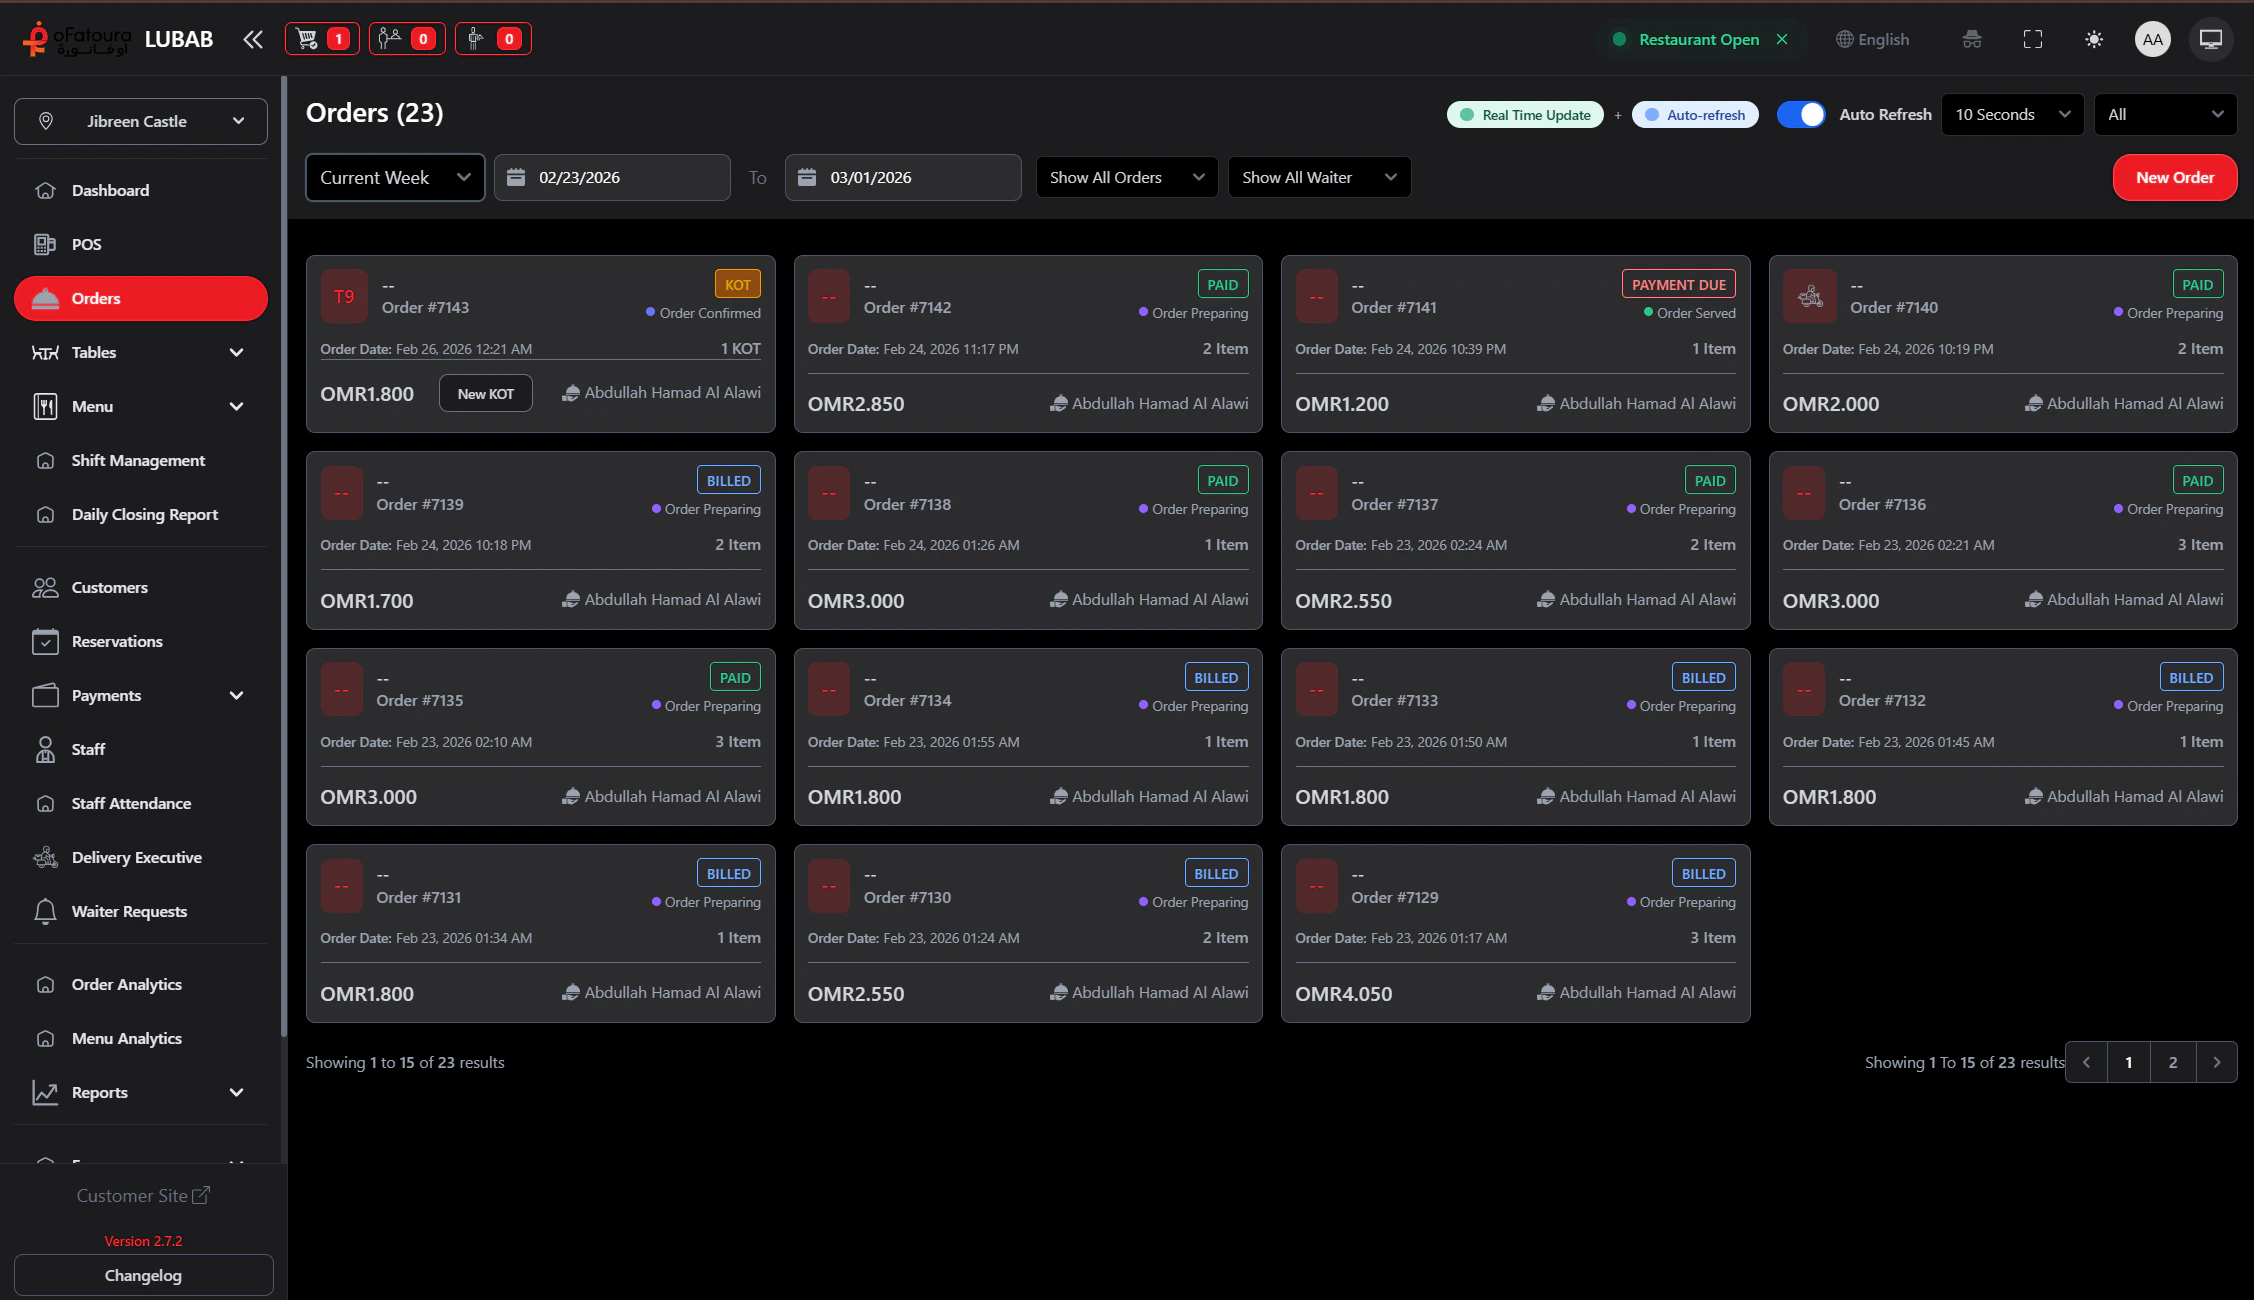
Filter the List
Use available filters to narrow results:
- Date range
- Status
- Order type
- Waiter (role/permission dependent)
Actions vary by role permissions and current order status.
KOT Workflow
Kitchen communication flow
Daily Closing
Reconcile end-of-day activity